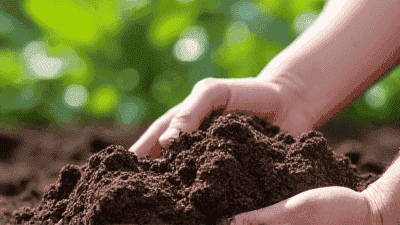
Gardening is an incredibly rewarding hobby, but the success of your garden largely relies on the condition of the soil. Healthy soil is the foundation for thriving plants, providing essential nutrients, water, and a supportive structure for roots. To ensure your garden flourishes, conducting soil testing is a crucial step that every gardener should undertake.
Understanding Soil Composition and Health
Soil is a complex mixture of minerals, organic matter, air, and water. Its composition directly affects plant growth and health. A healthy garden soil contains a variety of nutrients, a balanced pH level, and beneficial microorganisms that promote plant health. When soil lacks any of these components, plants can struggle to thrive.
Key Components of Soil
Minerals: Made up of sand, silt, and clay, minerals impact soil texture and water retention.
Organic Matter: Decomposed plant and animal materials provide essential nutrients to plants and improve soil structure.
Air: Oxygen is vital for root respiration, while carbon dioxide is necessary for photosynthesis.
Water: Adequate moisture is necessary for nutrients to dissolve and be accessible to plants.
Microorganisms: Beneficial bacteria, fungi, and earthworms play a crucial role in nutrient cycling and soil aeration.
Why Conduct Soil Testing

Soil testing allows gardeners to gain insight into the composition and health of their soil. Here are several compelling reasons to conduct soil testing:
1. Assess Nutrient Levels
Soil testing reveals the available nutrients in your garden, including nitrogen, phosphorus, potassium, calcium, magnesium, and sulfur. This information helps you understand what nutrients your soil may lack and how to amend it accordingly.
2. Determine pH Levels
pH is a measure of soil acidity or alkalinity. Most plants prefer a slightly acidic to neutral pH level, typically ranging from 6.0 to 7.0. Testing your soil’s pH allows you to determine whether it is suitable for your intended plants and how to adjust it if necessary.
3. Identify Soil Texture
The texture of the soil affects its drainage, aeration, and nutrient retention. Soil testing helps identify whether your soil is sandy, loamy, or clayey, enabling you to amend it for optimal plant growth.
4. Detect Contaminants
Soil testing can uncover harmful contaminants such as heavy metals or pesticides, providing critical information about the safety of growing vegetables or fruits in your garden.
5. Tailor Fertilization Techniques
Understanding nutrient levels and pH allows you to create a tailored fertilization plan. Instead of applying generic fertilizers, you can target specific deficiencies, leading to healthier plants and reduced fertilizer waste.
How to Conduct Soil Testing
Conducting soil testing can be done through several methods, depending on your needs and resources. Whether you choose to use a professional laboratory service, home testing kits, or DIY methods, each approach has its advantages.
1. Professional Soil Testing Services
Sending soil samples to a professional lab is one of the most accurate methods for testing soil. Professional services analyze various parameters, including nutrient levels, pH, organic matter content, and soil texture.
Steps for Professional Soil Testing
Choose a Reputable Lab: Research local agricultural extension offices or commercial labs that offer soil testing services.
Collect Samples: Follow the best practices for collecting soil samples, as described in the next section.
Submit Samples: Send your samples to the lab along with any required forms or payment.
Review Results: After a few days or weeks, you will receive a detailed report outlining your soil's nutrient levels and recommendations for amendments.
2. Home Soil Testing Kits
Home soil testing kits are an accessible and cost-effective option for gardeners looking to test their soil on their own. These kits typically include pH testing strips, nutrient test reagents, and instructions.
Steps for Using Home Testing Kits
Gather Your Supplies: Purchase a soil testing kit from a garden center or online.
Collect Samples: Collect soil samples from various areas of your garden and mix them together for a composite sample.
Conduct Tests: Follow the kit's instructions to conduct pH and nutrient tests. Most kits will provide color charts to help you interpret the results.
3. DIY Soil Testing Techniques
For gardeners who enjoy hands-on projects, there are simple DIY methods to conduct some basic soil tests. While these techniques may not provide precise measurements, they can give you useful information about soil texture and drainage.
Common DIY Soil Tests
Ribbon Test: This test helps determine soil texture. Take a small handful of moistened soil and squeeze it into a ball. If it forms a ribbon when you press it, this indicates a higher clay content. Sandy soil will fall apart, while loamy soil will hold together without forming a long ribbon.
Drainage Test: To assess drainage, dig a hole approximately 12 inches deep and fill it with water. Measure how long it takes for the water to drain completely. If it drains in under an hour, your soil is well-draining. If it takes several hours, your soil may have drainage issues.
Collecting Soil Samples

Properly collecting soil samples is crucial for obtaining accurate test results. Follow these steps for effective soil sampling:
1. Gather Tools and Materials
- Clean shovel or trowel
- Clean bucket or container
- Plastic or paper soil sample bags
- Clean water (if necessary for testing)
2. Choose Sampling Locations
Take samples from multiple locations in your garden to ensure a representative sample. Focus on areas where plants are growing, as well as spots where you plan to plant new crops.
3. Collect the Samples
- Remove any surface debris, such as leaves or mulch, from each sampling area.
- Use your shovel to dig down approximately 6 to 8 inches into the soil. Avoid collecting samples from areas treated with chemicals or fertilizers recently.
- Place the soil into your container or bag.
4. Mix and Prepare the Composite Sample
- Once you've collected samples from different locations, mix them thoroughly in a clean bucket to create a composite sample.
- Take a small amount of the mixed soil and place it in a labeled bag for testing.
Interpreting Soil Test Results
Understanding soil test results can be overwhelming, but it is essential to make informed decisions about your soil amendments. Here are key components of a typical soil test report:
1. Nutrient Levels
The report will outline the levels of essential nutrients, such as nitrogen, phosphorus, and potassium. These nutrients often have recommended ranges for various plant types. If levels are below the recommended range, you may need to incorporate fertilizers or amendments to balance them.
2. Soil pH
The report will indicate the pH level of your soil, which directly affects nutrient availability to plants. Depending on your desired plants, you may want to adjust your soil pH.
- Adjusting pH:
- To raise pH (make it more alkaline), consider adding lime or wood ash.
- To lower pH (make it more acidic), consider adding sulfur or peat moss.
3. Organic Matter Content
This section measures the percentage of organic matter in your soil. Higher organic matter levels usually indicate healthier soil, so consider adding compost or other organic amendments if levels are low.
4. Soil Texture Analysis
Some reports may provide information about soil texture, indicating the proportion of sand, silt, and clay in your soil. Use this information to make decisions about drainage improvements or soil amendments.
Improving Soil Quality

Once you have understood your soil test results, you can take necessary steps to improve soil quality. Here are various approaches to enhance your garden soil:
1. Adding Organic Matter
Incorporating organic matter into your soil can improve structure, aeration, and nutrient retention.
Compost: Add well-decomposed compost to enrich your soil with nutrients.
Mulch: Applying organic mulch, such as wood chips or straw, improves moisture retention and adds organic matter as it breaks down.
Cover Crops: Consider planting cover crops in the offseason to improve soil structure and prevent erosion.
2. Amending Nutrients
Depending on your nutrient level analysis, consider specific amendments to address deficiencies.
Nitrogen: Use nitrogen-rich fertilizers, such as blood meal or fish emulsion, to boost nitrogen levels.
Phosphorus: Bone meal and rock phosphate can add phosphorus to the soil.
Potassium: Kelp meal and greensand are excellent sources of potassium for plants.
3. Improving Drainage
If your soil tests indicate drainage issues, consider these practices:
Amend with Organic Matter: Adding compost helps improve drainage while enhancing nutrient-holding capacity.
Raised Beds: Creating raised garden beds can improve drainage and provide better control over soil quality.
Improve Soil Texture: If your soil is heavily clayey, consider incorporating sand or gypsum to improve drainage.
Conclusion
Garden soil testing is an essential practice for every gardener seeking to cultivate a healthy and productive garden. By understanding your soil’s composition, pH levels, and nutrient analyses, you can tailor your gardening techniques to promote growth and vitality in your plants.
Through proper soil sampling, interpretation of test results, and effective amendments, you will ensure that your garden thrives for years to come. This proactive approach not only enhances plant health but ultimately contributes to a flourishing garden that brings joy and satisfaction to your gardening journey.